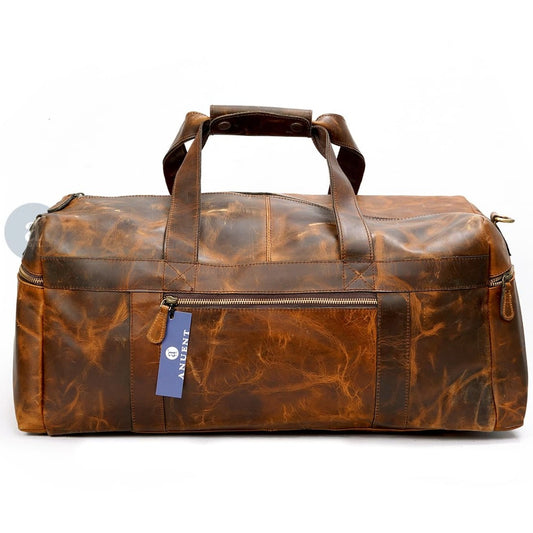
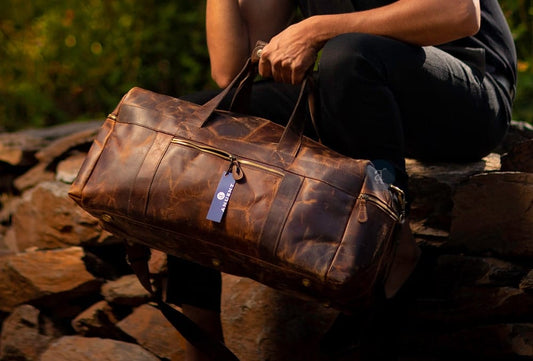
TL;DR
Clean leather bags with a damp cloth and leather-specific cleaner—never household soaps, disinfectants, or excessive water.
For basic maintenance, wipe weekly and deep clean 2-3 times per year. Always condition leather after cleaning to restore moisture.
Different leather types require different approaches, and some stains need professional treatment.
When in doubt, test any product in a hidden area first.
KEY POINTS
- Use only leather-specific cleaners or mild soap solutions—household cleaners strip natural oils and cause cracking
- Always test cleaning products on a hidden area before applying to visible surfaces
- Condition leather after every deep cleaning to restore moisture lost during the process
- Different stain types require different removal methods—ink, oil, and dye transfer each need specific approaches
- Know when to stop—some stains set permanently, and aggressive cleaning causes more damage than the original stain
That stain on your leather bag is staring at you. Maybe it's coffee from last week.
Maybe mysterious marks from who-knows-where. Maybe the bag just looks dull and tired after months of use.
You want to clean it.
But you've heard horror stories—leather ruined by the wrong cleaner, bags dried out and cracked from improper care, colors changed permanently by well-meaning cleaning attempts.
Here's the truth: cleaning leather isn't complicated, but it does require the right approach. Use the wrong products or techniques, and you can cause damage far worse than the original dirt.
This guide covers safe cleaning methods for every situation, from quick maintenance to stubborn stain removal—without risking your bag.
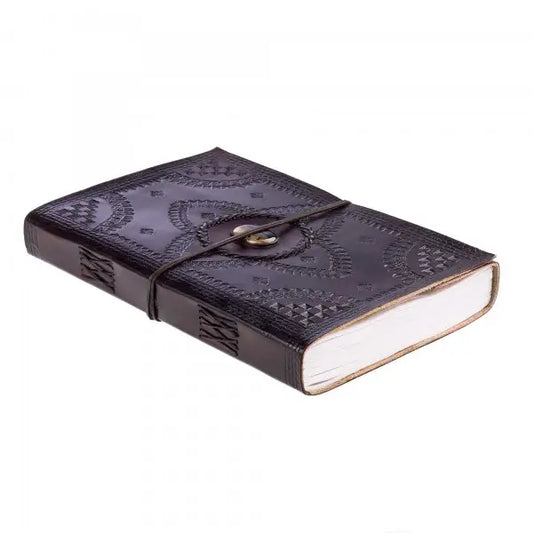
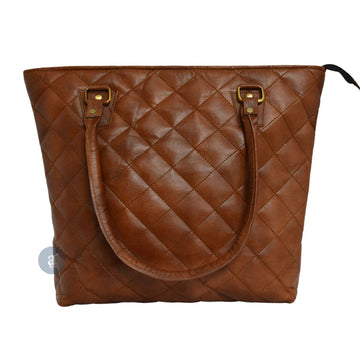
Before You Start: Know Your Leather Type
Different leathers respond differently to cleaning. What works perfectly on full-grain leather can ruin suede.
Before cleaning anything, identify what you're working with.
Why Leather Type Matters:
- Absorbency varies: Some leathers absorb liquids quickly; others resist moisture
- Finish differences: Coated leathers clean differently than natural-finish leathers
- Sensitivity levels: Delicate leathers can water-stain or discolor easily
- Surface texture: Smooth and textured leathers need different techniques
Quick Identification:
| If Your Leather... | It's Probably... | Cleaning Approach |
|---|---|---|
| Has visible natural grain, variations, and develops patina | Full-grain | Most forgiving; standard methods work well |
| Looks uniform and smooth with slight sheen | Top-grain (coated) | Careful with excess moisture; gentle cleaners |
| Has artificial-looking uniform texture | Genuine leather (coated) | Very careful; coating can be damaged |
| Feels fuzzy or velvety | Suede or nubuck | No liquids; specialized dry cleaning only |
| Is very shiny, almost plastic-looking | Patent leather | Different technique entirely |
For detailed identification methods, our guide on how to tell if your leather bag is real covers tests you can perform.
Products to Avoid on ALL Leather Types:
- Bleach or bleach-based cleaners
- Ammonia or ammonia-based cleaners (including many glass cleaners)
- Disinfecting wipes
- Alcohol-based cleaners
- Acetone or nail polish remover
- Harsh detergents
- Abrasive scrubbing pads
These products strip natural oils, break down leather fibers, dissolve finishes, or cause irreversible discoloration.
Basic Cleaning for Regular Maintenance
Regular light cleaning prevents dirt buildup that requires aggressive treatment later.
Weekly Dusting Routine (30 seconds):
- Empty the bag completely
- Use a soft, dry cloth or microfiber to wipe all exterior surfaces
- Pay attention to creases, seams, and hardware areas where dust collects
- Wipe hardware (zippers, buckles) to prevent tarnish buildup
This quick routine prevents surface dirt from working into the leather grain over time.
Monthly Light Cleaning (5-10 minutes):
Supplies needed:
- Clean, lint-free cloths (microfiber works well)
- Distilled water (tap water can leave mineral deposits)
- Leather cleaner (optional for this level)
Process:
- Empty the bag and turn out pockets
- Dampen a cloth with distilled water—wring thoroughly until barely damp
- Wipe all exterior surfaces in gentle, circular motions
- Use a dry cloth to remove any moisture immediately
- Allow to air dry completely away from heat and direct sunlight
- Apply a light coat of leather conditioner if desired
This monthly maintenance keeps leather supple and prevents the kind of dirt accumulation that requires deep cleaning.
How to Deep Clean a Leather Bag
Deep cleaning addresses accumulated grime, dullness, and overall dirtiness that light cleaning doesn't resolve.
When Deep Cleaning Is Needed:
- Visible dirt or darkening from handling
- Leather feels sticky or tacky
- Overall dullness that conditioning doesn't fix
- Before storing a bag for extended periods
- Seasonal cleaning (2-3 times per year for regularly used bags)
Supplies Needed:
- Leather cleaner (commercial leather-specific product)
- Distilled water
- Several clean, lint-free cloths
- Soft-bristle brush (optional, for textured leather)
- Leather conditioner
Step-by-Step Deep Cleaning Process:
Step 1: Prepare the bag
Empty completely. Remove any detachable straps or accessories.
Turn out all pockets. If there's a removable lining, take it out.
Step 2: Test your cleaner
Apply a small amount of cleaner to a hidden area—inside a pocket, bottom of the bag, or under a flap. Wait 10 minutes.
Check for discoloration, finish damage, or any adverse reaction. Proceed only if the test area looks normal.
Step 3: Apply cleaner
Put a small amount of leather cleaner on a soft cloth—not directly on the bag.
Work in sections, applying cleaner in gentle circular motions.
Step 4: Work systematically
Clean one panel or section at a time. Don't let cleaner sit and dry on the leather—work it in and remove the residue.
For textured leather or grain patterns, a soft brush helps work cleaner into crevices.
Step 5: Remove residue
Use a clean, slightly damp cloth to wipe away all cleaner residue. Follow immediately with a dry cloth.
Step 6: Dry properly
Allow the bag to air dry completely at room temperature. Never use heat (hair dryers, radiators, sunlight) to speed drying—heat damages leather.
Drying may take several hours or overnight.
Step 7: Condition
Once completely dry, apply leather conditioner to restore moisture lost during cleaning.
This step is essential—never skip it.
Removing Common Stains from Leather
Different stains require different approaches. Here's how to handle the most common problems.
Water Stains:
Ironically, water can stain leather—it absorbs unevenly, leaving visible marks when dry.
Solution:
- Don't try to dry the wet spot with heat
- Dampen the entire panel evenly with distilled water (using a damp cloth)
- This allows the leather to dry uniformly, eliminating the water line
- Let dry naturally, then condition
Prevention: Apply leather protector spray to create water resistance.
Ink Stains:
Ink is one of the hardest stains to remove from leather because it bonds chemically.
Solution:
- Act immediately—fresh ink is easier to address
- Blot (don't rub) with a clean cloth
- Apply a small amount of rubbing alcohol on a cotton swab—test first
- Gently dab the stain, working from edges toward center
- Wipe with a clean, damp cloth
- Repeat if needed, but stop if the leather shows distress
- Condition the area after treatment
Realistic expectations: Deep or set ink stains may never fully remove. Professional treatment offers the best chance for serious ink damage.
Oil and Grease Stains:
Oil absorbs into leather and darkens it.
Fresh oil stains are manageable; old ones are difficult.
Solution:
- Blot immediately with a clean cloth—absorb as much as possible
- Sprinkle cornstarch or talcum powder on the stain
- Let sit for several hours or overnight—the powder absorbs oil
- Brush away powder gently
- Repeat if the stain remains
- Clean the area with leather cleaner once oil is absorbed
For stubborn oil: Professional cleaning may be needed. Aggressive DIY attempts often spread the stain.
Food Stains:
Food stains vary widely depending on what caused them.
Solution:
- Remove any solid residue gently with a dull edge (credit card, butter knife)
- Blot any liquid—don't rub
- Clean with a damp cloth and mild leather cleaner
- For persistent stains, try the methods above for water, oil, or ink depending on the food type
Dye Transfer (Jeans, Clothing):
Dark jeans and clothing commonly transfer dye to light-colored leather.
Solution:
- Try a leather cleaner first—sometimes surface dye lifts easily
- For stubborn transfer, use a leather-specific stain remover
- Apply to a cloth, dab gently at the stain
- Avoid over-wetting the area
- Condition after treatment
Prevention: This is best prevented by avoiding contact between new, dark clothing and light leather until the clothing has been washed several times.
For stains that have caused surface damage, our guide on fixing scratches and scuffs on leather covers repair techniques.
How to Clean the Inside of a Leather Bag
The interior often gets dirtier than the exterior but is frequently overlooked.
Fabric Linings:
Most leather bags have fabric interior linings (cotton, polyester, nylon).
Routine cleaning:
- Turn the bag inside out if possible, or open fully
- Shake out debris
- Use a lint roller to remove dust and particles
- Vacuum with a brush attachment for thorough cleaning
Stain removal:
- Mix a small amount of mild liquid soap with water
- Dip a cloth in the solution, wring well
- Blot stains gently
- Use a clean, damp cloth to remove soap residue
- Allow to air dry completely before closing the bag
Leather Linings:
Some premium bags have leather interior linings.
Cleaning:
- Use the same gentle approach as exterior leather
- Work carefully in the confined space
- Use minimal moisture—interior leather is harder to dry
- Condition interior leather just as you would exterior
Dealing with Odors:
Bag interiors can develop unpleasant smells from spills, storage, or general use.
Solutions:
- Baking soda: Place an open container of baking soda inside the closed bag overnight. It absorbs odors.
- Activated charcoal: Wrap charcoal packets in cloth and place inside the bag for 24-48 hours.
- Fresh air: Simply leaving the bag open in a well-ventilated area for a day can reduce mild odors.
- Coffee grounds: Wrapped in cloth, these can absorb musty smells.
For persistent odors: Professional cleaning may be necessary. Some odors (smoke, mold, strong perfume) penetrate leather and are very difficult to eliminate completely.
Regular interior cleaning prevents the buildup of debris that can scratch leather from the inside—especially important for bags like leather messenger bags that carry laptops and documents.
Cleaning Different Leather Types
Adjust your approach based on your specific leather type.
Full-Grain Leather:
Characteristics: Natural surface with visible grain variations. Most durable and forgiving.
Cleaning approach:
- Standard methods work well
- Can handle slightly more moisture than other types
- Responds excellently to conditioning
- Scratches during cleaning often blend into patina
Best products: Leather cleaners specifically formulated for full-grain or natural leather.
Top-Grain Leather:
Characteristics: Sanded and coated for uniformity. Smooth, consistent appearance.
Cleaning approach:
- Be cautious with moisture—finish can trap water
- Use less product than with full-grain
- Avoid aggressive scrubbing that can damage the finish
- Test all products carefully
Best products: Gentle leather cleaners; avoid anything abrasive.
Genuine Leather:
Characteristics: Heavy coating over lower-quality leather. Often artificial-looking grain.
Cleaning approach:
- Very gentle—the coating is the main surface
- Minimal moisture
- Avoid any abrasives
- If coating is damaged, the leather beneath is vulnerable
Note: As discussed in our leather grades guide, genuine leather is more prone to damage and harder to restore than higher grades.
Suede and Nubuck:
Characteristics: Fuzzy, napped surface. Highly absorbent.
Cleaning approach:
- Never use water or liquid cleaners
- Use a suede brush to lift the nap and remove surface dirt
- Use a suede eraser for scuffs and marks
- For stains, use suede-specific cleaning products only
- Consider professional cleaning for serious issues
Best products: Suede brush, suede eraser, suede protector spray.
Patent Leather:
Characteristics: Very shiny, almost lacquer-like finish.
Cleaning approach:
- Wipe with a damp cloth to remove dust
- Use patent leather cleaner or a small amount of mineral oil
- Buff with a soft cloth for shine
- Avoid contact with newspaper or printed materials (dye transfer)
- Never use regular leather conditioner—it dulls the finish
Products to Never Use on Leather
Some commonly suggested cleaning methods cause significant harm.
Household Cleaners That Destroy Leather:
| Product | Why It's Harmful |
|---|---|
| All-purpose cleaners | Contain degreasers that strip natural oils |
| Glass cleaner | Ammonia damages leather proteins |
| Disinfecting wipes | Alcohol and chemicals dry and crack leather |
| Dish soap | Too harsh; leaves residue that attracts dirt |
| Laundry detergent | Far too aggressive for leather |
| Bleach | Destroys leather fibers and discolors permanently |
DIY Remedies That Backfire:
- Olive oil: Often recommended online but problematic. It can go rancid over time, creating odor. It also doesn't penetrate leather properly and can leave sticky residue.
- Vinegar: Too acidic for leather. Can cause discoloration and dryness. Even diluted, it's risky.
- Hair spray: Suggested for ink stains, but modern hair sprays contain ingredients that damage leather finishes.
- Nail polish remover: Acetone dissolves leather dyes and finishes instantly. Never use it.
Why Baby Wipes Are Problematic:
Baby wipes seem gentle, but most contain:
- Alcohol (dries leather)
- Fragrance (can stain or react with leather)
- Moisturizers not designed for leather (can leave residue)
- pH levels wrong for leather care
Some people use baby wipes without immediate visible damage, but repeated use degrades leather over time.
The Rule: If a product isn't specifically formulated for leather, don't use it on leather. The short-term convenience isn't worth the long-term damage.
Conditioning After Cleaning
Cleaning removes dirt—but it also removes some natural oils.
Conditioning restores them.
Why Conditioning After Cleaning Is Essential:
- Cleaning agents, even gentle ones, strip some protective oils
- Leather that's cleaned but not conditioned dries out faster
- Dry leather cracks, stiffens, and becomes vulnerable to damage
- Conditioning restores the supple feel and protective barrier
How to Condition Properly:
- Ensure leather is completely dry after cleaning
- Apply a small amount of conditioner to a soft cloth
- Work conditioner into leather using circular motions
- Cover all exterior surfaces evenly
- Allow to absorb for 15-30 minutes
- Buff away any excess with a clean, dry cloth
Frequency Recommendations:
| Usage Level | Conditioning Frequency |
|---|---|
| Daily use | Every 2-3 months |
| Regular use (few times weekly) | Every 4-6 months |
| Occasional use | Every 6-12 months |
| After any deep cleaning | Always |
| After exposure to rain | Within 24 hours of drying |
Choosing a Conditioner:
Look for products specifically designed for your leather type.
Avoid products with silicone or petroleum as primary ingredients—they coat rather than nourish leather.
According to Leather Naturally, properly maintained leather can last decades, with conditioning being one of the most critical factors in longevity.
When to Seek Professional Cleaning
Some situations exceed safe DIY treatment.
Signs You Need Professional Help:
- Stains that won't lift: If multiple careful attempts haven't worked, stop before causing more damage
- Large affected areas: Extensive staining or dirt is harder to treat evenly at home
- Mold or mildew: Requires proper treatment to fully eliminate and prevent return
- Valuable or designer bags: The risk of DIY damage may not be worth it
- Exotic leathers: Crocodile, ostrich, snake, and other exotics need specialized knowledge
- Structural issues: If cleaning reveals underlying problems (peeling, deterioration)
- Antique or vintage leather: Old leather can be fragile and react unexpectedly
What Professional Cleaners Can Do:
- Deep clean using industrial-grade but leather-safe products
- Remove stains that home methods can't address
- Restore color evenness after stain damage
- Treat mold and mildew completely
- Re-dye or refinish leather if needed
- Identify and address structural issues
Cost Expectations:
- Basic professional cleaning: $30-$75
- Stain removal: $50-$150 depending on severity
- Full restoration (cleaning, conditioning, color touch-up): $150-$300+
Finding a Leather Care Professional:
- Search for "leather cleaning" or "leather restoration" in your area
- Avoid generic dry cleaners—look for specialists
- Ask if they specifically work with bags (not just furniture or garments)
- Request to see examples of their work
- Get an estimate before leaving your bag
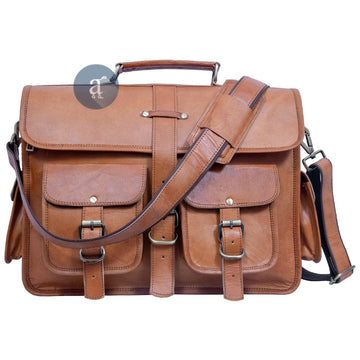
For professional bags like leather briefcases, professional cleaning every 1-2 years can maintain the appearance needed for business environments.
FAQ
Can I use soap and water on leather?
Very mild soap (like castile soap or specially formulated saddle soap) diluted in water can be used sparingly on some leather types.
However, regular hand soap, dish soap, and body wash are too harsh.
When possible, use leather-specific cleaners instead. If using soap, ensure it's pH-neutral and always condition afterward.
How often should I clean my leather bag?
Light cleaning (wiping with a dry or barely damp cloth) can be done weekly.
Deep cleaning should happen 2-3 times per year for regularly used bags, or as needed when visible dirt accumulates.
Over-cleaning is almost as harmful as neglect—leather doesn't need aggressive frequent cleaning, just regular gentle maintenance.
Can I put a leather bag in the washing machine?
No. Machine washing destroys leather.
The water volume, agitation, and detergent will strip oils, distort the shape, damage stitching, and potentially ruin the leather entirely.
Leather should only be cleaned by hand using appropriate methods.
Even "washable leather" products should be hand-washed carefully, not machine-washed.
How do I clean white or light-colored leather?
Light leather shows dirt and stains more easily and requires extra caution.
Use white or undyed cloths only (colored cloths can transfer dye).
Clean more frequently with lighter touch.
Address stains immediately—they're more visible and can set faster.
Consider professional cleaning for valuable light-colored pieces, as DIY stain removal attempts can cause discoloration.
What removes mold from leather?
For surface mold: Take the bag outside (avoid spreading spores indoors). Brush off visible mold with a soft brush.
Mix equal parts rubbing alcohol and water, apply with a cloth, and wipe the affected area.
Let dry in sunlight briefly (20-30 minutes—not longer). Condition thoroughly afterward.
For serious mold penetration or recurrent mold, professional treatment is recommended—improper treatment can drive mold deeper into the leather.
The Bottom Line
Cleaning leather safely comes down to three principles:
- Use the right products: Leather-specific cleaners only. Never household chemicals, never DIY concoctions.
- Less is more: Minimal moisture, gentle pressure, careful testing. You can always do more—you can't undo damage.
- Always condition: Every cleaning removes some natural oils. Restore them.
Regular light maintenance prevents the heavy cleaning that stresses leather.
A weekly wipe-down and monthly light cleaning keeps most bags looking excellent indefinitely.
When stains happen, act fast but carefully. Test first. Know your leather type. And know when to stop and seek professional help.
Explore our full leather bags collection.
Every bag is crafted from top-grain, goat and genuine leather that cleans easily and ages beautifully with proper care.