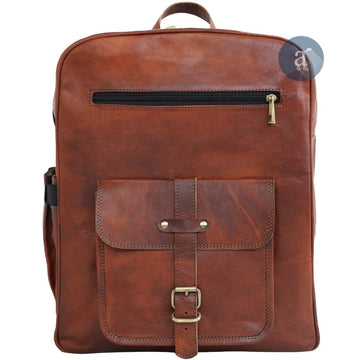
Whether you're carrying schoolbooks, hiking gear, or your daily workday essentials, the humble backpack strap is an unsung hero.
Until it fails, that is!
It's remarkably frustrating when a perfectly good bag is rendered uncomfortable or even unusable by a broken strap.
You might think your backpack is bound for the trash, but don't despair just yet!
A damaged or broken backpack strap doesn't always mean you need to buy a new backpack.
Many common strap problems are surprisingly easy to fix, saving you money and extending the lifespan of your trusty backpack.
Let's dive into the world of backpack repair and show you how to make that troublesome strap as good as new.
Assess the Damage

Before we start wielding needles and thread, it's essential to figure out what kind of damage you're dealing with.
This will help you figure out if your project is a quick DIY fix or something that needs professional help.
Here are the usual suspects when it comes to backpack strap issues:
- Tears and Rips: Complete or partial tears are the most visually obvious problems and can range in severity.
- Fraying: The ends of the straps gradually loosen and fray, which weakens the material and often indicates it's on the verge of tearing.
- Buckle Trouble: Broken or warped buckles can't adjust straps properly, which impacts fit and comfort.
- Constant Slippage: You meticulously tighten the strap, and it immediately loosens again. This often boils down to incorrect threading or improper buckle usage.
How Difficult is the Repair?
Some backpack repairs are easier than others. Simple fraying, minor tears, and strap slippage are generally user-friendly DIY projects.
Complex tears, damaged buckles, or problems deeply integrated into the main body of the backpack may require a professional seamstress, tailor, or a gear repair shop.
Simple Repairs
Let's start with the most common and straightforward backpack strap fixes you can handle with basic tools and simple repair skills.
Slipping Straps
It's frustrating when you carefully adjust your backpack straps only to have them slide right back to maximum length a few minutes later.
Often, this issue isn't damage at all but rather a case of incorrect use.
- Re-Threading: Take a close look at how the strap passes through your adjustment buckle. There's usually a specific pattern to follow to ensure it locks effectively. Refer to your other strap if that one's functioning correctly.
- Readjustment: Don't neglect the basics! Sometimes, we forget to pull the tail end of the strap tight after making adjustments.
- Temporary Fix: If your repair needs to be fast, a piece of velcro placed along the strap can increase friction, temporarily reducing slippage. This isn't a permanent solution, however.
Fraying Straps
Those fuzzy loose ends aren't just unsightly; they'll continue to unravel until the strap becomes weak. Catch fraying early with these tricks:
- Trim: Sharp scissors cleanly cut away the frayed section, leaving a neat edge.
- **Melt (Carefully!): ** To prevent the new edge from fraying, you can gently apply a flame from a lighter or match to melt the fibers slightly. Be quick, and focus the heat only on the very end to avoid damaging the rest of the strap.
More Involved Repairs
Sometimes, simple fixes don't quite cut it, and a slightly more hands-on approach is needed.
If you're comfortable with basic hand-sewing or have a trusty sewing machine, read on to tackle these common fixes.
Torn Straps
A clean tear in the middle of a backpack strap requires stitching to restore its strength and integrity.
This is best done with thick, durable thread and a sturdy needle.
- Materials: Strong nylon or upholstery thread is ideal. Ensure your needle is sharp and able to puncture the strap material.
- Stitch and Reinforce: Using a simple backstitch, carefully sew the torn edges together, overlapping the original seam for strength. Go back and forth a few times over the repaired area for reinforcement.
- Optional Webbing: For major tears, adding a piece of webbing sewn over the repair patch can offer extra support.
Broken Buckles
While not as easily patched as frayed fabric or small tears, buckles are readily replaceable and often the key to restoring proper adjustment and wearability.
- Finding the Right Replacement: Size matters! Measure your existing buckle's width and the thickness it's designed to accept. Online outdoor suppliers or even craft stores should carry replacement options.
- Removal: Depending on the existing buckle, simple cutting might be the most efficient removal method. Be sure to leave enough strap length to attach your new buckle.
- Attachment: Sewing is usually the method here. However, some replacement buckles can be slotted onto the strap like the original. Ensure your stitches are strong and close together!
Important Note: When sewing through thicker materials like backpack straps, a thimble will protect your fingers. If you don't have one, a small scrap of leather or thick folded fabric can also work in a pinch.
Also read Messenger Bags vs. Backpacks: Which is Better for Commuting?When to Seek Professional Help

You've diligently assessed the damage, tried DIY repairs, and maybe even achieved some success.
But there are times when it's simply wiser to acknowledge that you might need some help.
A professional with access to the right tools and specialized knowledge can make a huge difference in these cases:
- Severe Damage to the Main Body: We talked briefly about tears or other problems extending into the base fabric of your backpack. A seamstress, tailor, or gear repair shop will have industrial-grade sewing machines and a better understanding of backpack construction to handle these major fixes properly.
- Complex Strap Systems: Serious hiking backpacks like The Explorer have multi-strap systems for weight distribution, adjustment, and stability. It's easy to make things worse instead of better with these setups without specialized knowledge. An outdoor gear store may be able to help repair or even offer modifications to these.
- If Personal Repairs Aren't Working Correctly: Sometimes, even if you follow directions exactly, the repair just doesn't 'take.' The stitches keep coming loose, the strap continues to fray, or something else keeps sabotaging your efforts. If this happens, don't despair; let a pro take a look!
Conclusion
Let's bring this all together! You now have a thorough understanding of how to address most of the common malfunctions plaguing backpack straps.
- Fix, Don't Replace: DIY-ing these repairs saves you money and prevents usable backpacks from ending up in a landfill. It can be quite satisfying to bring your gear back to life!
- Preventative Care: Properly load your backpack to avoid overstressing the straps and distribute weight evenly. Be a little gentler with adjusting buckles– they don't do well with repeated yanking!
FAQs
Now's the perfect time to tackle some remaining questions readers might have about backpack strap repairs:
Q: Is Tt Expensive to Fix a Backpack Strap?
A: In most DIY scenarios, the cost is incredibly low – possibly just some replacement thread and your time. Even professionally, these repairs typically aren't costly unless something very extensive is going on.
Q: Can I use Any Type of Thread?
A: No. For strap repairs to be secure, opt for nylon thread or even stronger upholstery thread to withstand the loads you'll put on your bag.
Q: What If My Strap is Completely Ripped Off?
A: Reattaching an entirely separated strap usually involves sewing it back into the material of the backpack itself. Unless you're very confident in your sewing skills, professional help is the best path to take here.
Additional Things to Consider
These final tidbits of advice add value for your readers:
- Images and/or Videos: Step-by-step photos or even short videos of techniques (like hand-stitching or re-threading a buckle) can greatly improve this guide's user-friendliness.
- Tools and Materials: A concise list summarizing the items someone might need (needle types, scissors, lighter, etc.) lets readers pre-gather all their supplies before starting a repair.
- Alternative Methods: It's okay to be creative! A sentence or two covering temporary fixes like duct tape lets people get the immediate use they need from their bag, then gives them time to plan a more permanent repair.


